How brown was our yard

Last summer I managed to get part of our front yard prepared and seeded with grass. By the end of the summer we had a partially green front yard. I am now working on the rest of the front yard, and it’s a hard slog.

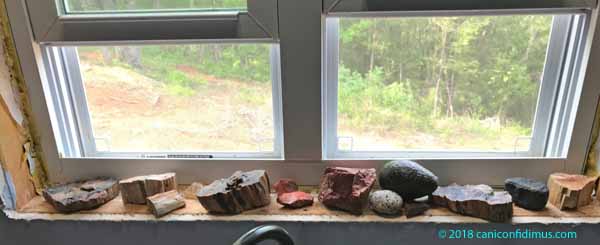
This is what the prepared yard looked like last year. I used this image in a post when I was working on it.

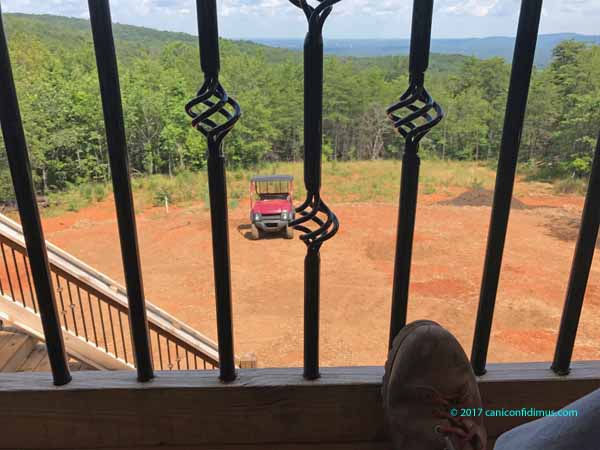
You can see a few spots where I had to spread some dirt to fill in the gullies washed by a year’s worth of rain, but the rest is generally the way it was when I started the process. Behind the Mule is the area where I’m working now. It was not graded smooth and a lot of weeds and small trees had sprouted. It was even worse this year.

I started early in the spring by burning as much of the growth as I could. Then I sprayed glyphosate several times to kill as much as I could. When most of the green had turned brown, I started skimming the surface and digging some out by the roots with a shovel. This was a long, arduous process that could have been done in a day by a piece of machinery.

Once all of that was done, the front part of the yard was bare but very rough and uneven. I don’t particularly care whether it has a nice, smooth, rounded profile, but it needs to be even so the lawn mower doesn’t dip and scalp the grass. So I made this. 
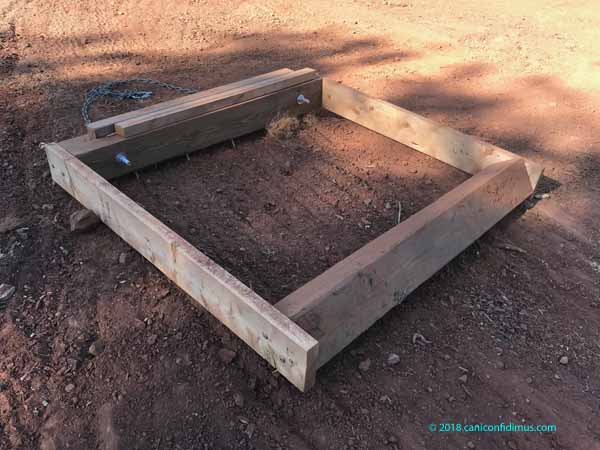
This is a combination scarifier-grader. It’s an eight-foot, pressure treated 6X6 and an eight-foot 2X6. I cut both in half. I drove 10 8-inch spikes through the front 6X6 and turned the second 6X6 45 degrees. Then I put two big eye-bolts through the front part and attached the rig to the Mule with a chain. Then I dragged it around in circles for a while.

What I hoped would happen is that the spikes, which protrude about two and a half inches, would break up the surface soil, and then the second 6X6 would spread it out evenly, hopefully filling in low points. What I feared is that the spikes would either bend or be driven back up, and that the ground would be so hard the spikes would barely scratch the surface. In the end, it was a little of both. The spikes bent a little but stayed in place, and in some places they barely scratched the surface. But overall, it did what I wanted.

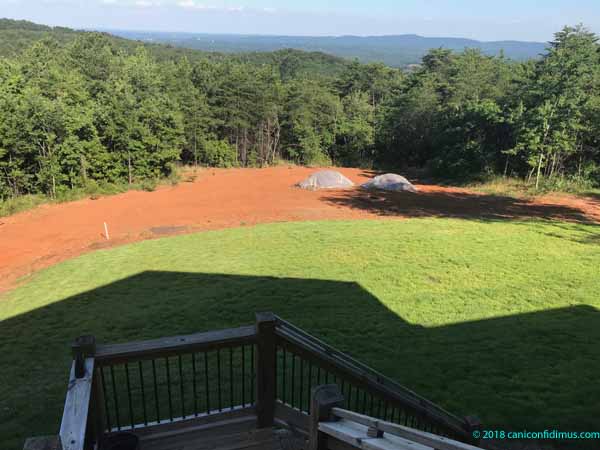
It’s hard to tell from this photo, but the front part of the yard is rolling but pretty smooth. There are a few places that have hard dirt but most of the area has a couple of inches of find, ground-up dirt that should work well when I till in about three inches of topsoil, which is now stored in the two piles you can see. There are also a few low spots I need to fill, but not too many.

So, my home-made grader worked out well. Now all I have to do is spread the topsoil using the trusty Mule and a shovel, till it, spread fertilizer, sow seed, roll it, sprinkle it, and hope for the best.

Of course I’m simplifying this account, because there is an area to the side of the house that I still have to work on. I won’t be able to use my scarifier-grader because the slope is too great, so I’ll have to do that part entirely by hand. But I’m going to finish the front of the yard first so it will have a chance to germinate.

Oh, and we need rain.

Which one of these …

…is not like the others?

No, it’s not the red one(s), although is is (they are) not like most of the others.

And no, it’s not the little round one that’s white with black spots — a Dalmation rock, although it is not like most of the others.

OK, it’s the green one behind the round rock, and it’s not a rock at all, it’s an avocado.

I was washing out a dish when it hit me that not all the rocks on the window stool were actually rocks. Leah wanted something to put there, so we picked out some of the petrified wood I had collected over the years, mainly from Utah. I am still kicking myself for leaving a large collection of amethyst that my father had found in my parents’ travels.

Please don’t look at the window. It’s still not trimmed out. I seem to find something to do other than trimming the windows. I have managed to get two done, or almost done, and they look like this:

This window is complete except that I need to paint it again to cover the caulk I used on the nail holes and to hide the few, very few, very, very tiny cracks resulting from my less than professional carpentry.

I occasionally amuse myself by counting the number of windows and doors I still need to finishing trimming out, and trying to calculate how long it will take. I have found that it takes much longer if I never actually start working, and much less time when I actually do start working. But right now I am mainly working in the yard. I have some plants to plant, and then a fairly large area to prepare for planting grass seed. It’s weedy, mainly bare dirt with ruts and humps that I have to clear of weeds and smooth as much as I can with a shovel. I expect not to get back to inside work for a while.

Beating a problem

I’m still working on trim in the new house. It’s a slow process, at least the way I do it. Part of the problem is finding a way to do noisy, scary things without unduly spooking the dogs and cats, but there are other problems, as this picture shows.

This is the door that leads from our kitchen into the garage. You can see the light yellow foam insulation around the door frame. The white strip down the right side is the result of making the drywall even with the edge of the door frame.

This is a problem in a lot of places throughout the house. In some places, when the drywall was cut to fit around the door, there was a ragged edge of torn paper around the opening and that ragged edge turned hard when it was painted. I have to cut that away with a utility knife. In other places the drywall was not screwed down adequately. Sometimes a few drywall screws can solve that problem. In yet other places, for some reason, the framing plus drywall was simply too thick. All this makes fitting door trim more than just painting, cutting to length and nailing.

Our interior doors came pre-hung and sized for either 2-by-4 or 2-by-six walls with about a half an inch of drywall on both sides. In a perfect world, the door frame would fit flush with the wall every time. But anything built by men with hammers and power drywall screw drivers is not perfect.

Using a utility knife or chisel was not getting the job done. Then one day while reading online about trim work, I saw a casual comment about how professional trim installers handle this problem. They use hammers.

There’s an old saying attributed to Mark Twain: “To a man with a hammer, everything looks like a nail.” It’s true, at least a lot of the time. But then, a hammer can be a useful tool for a lot of things other than driving nails. I have found that the quickest way to even out the door frame-drywall joint is to simply hammer the hell out of the high spots in the drywall. That smashes the drywall down and, if there’s still too much, just turn the hammer around and beat it with the claw end.

It also releases some pent-up anger and frustration at framers and drywall hangers.

So that’s why you can see white around the right side of the kitchen door. This especially offensive spot needed vigorous beating and clawing, so vigorous that the door casing will sit significantly below the adjoining drywall. But, from the kitchen, you won’t be able to see how deep the trim is set into the drywall (the cabinet keeps you from looking at the side of the trim), or the roughed-up drywall. That’s the beauty of trim.

Trim work

I have been working on trim in the house lately. We’re going with a Craftsman style for several reasons. For one, I don’t have to miter the corners. For another, I like it.

Here’s a view of the kitchen with a small closet on the left, the freezer alcove in the middle and the laundry enclosure on the right.

kitchentrim

I have finished the trim from the right side of the laundry area door to the right side of the closet door. Here’s a close-up of the top of the door casing.

laundrytrim

The top piece is the head casing. If you’re looking for a much more impressive name, you could call it the entablature, but I think that might be stretching it a bit. The top casing is made from a piece of stop molding to give a little definition to the bottom of the casing. The center of the casing is a slightly cut-down one-by-six. The top is a slightly cut down piece of brick molding. It still needs to have the nail holes and little gaps filled. Once that’s done, I’ll add another coat of paint. The paint looks white, but it’s slightly off-white to match the doors, which were painted at the factory. I think the factory called the color “moonglow.”

Here’s my work area. At some point it will be called our garage. I used to think our garage was huge. Not so much now.

messingarage

I have a painting station on two sawhorses in the foreground. Behind that is my miter saw, which hides my table saw. To the right of that is a whole bunch of stuff that will eventually end up in a storage building or, possibly, in the basement. Among that stuff is the temporary sink the cabinet installers put in before the countertops were installed. There’s also a chainsaw, a tool bag, two lawnmowers, a pressure washer, some Mexican rugs, a compressor, two generators, four cat beds and two cat houses with heated pads. It might be a fun game to find stuff in the picture. Did you notice Smokey?

I use the compressor and a nail gun to install the trim. We usually keep the garage door up a little to let the cats come and go, but when I’m using the nail gun I close it to keep Zeke from running away. He does not like the sound it makes. Unfortunately for Zeke, I have a whole lot more trim to do.

Before sunrise

This was the view out our side bedroom window on Wednesday morning, just after dawn.

drive_pave

We’re having our driveway paved. Concrete guy David, the same concrete guy who did the basement slabs and drive at our old house, is doing this one, too. He started early Monday, skipped Tuesday (except for a predawn visit to get some of his tools) and then returned Wednesday morning while it was still dark. He and his workers prepared the forms, and a truck showed up around 7:30. Needless to say, we did not sleep through this.

The odd pattern in the photo at the top right is the reflection of my iPhone in its case. It took me a few moments to figure that out. I could have opened the window, but that would have drawn attention to the fact that I was standing in my sleeping shorts in front of an almost full-length window. The woman in the yellow shirt standing at the rear of the truck is the driver.

David told me he is 53 years old, but in concrete years he is 93. Two of his workers are also of a certain age, although probably not as old as me. I was surprised that the third in his crew is a young man. I wonder if he will continue in this line of work. It seems to take a toll on those who do it.

David and his crew finished to within about 15 feet of the street on Wednesday. They plan to return early Thursday. Fortunately for us, they will be at the bottom of the driveway, so we might be able to sleep a little later. Leah, unfortunately, will have to feed the cats earlier than normal because the commotion scares them away.

The driveway from the large pad outside the garage to the road is about 300 feet long. So far it has taken seven truckloads of concrete, each about nine cubic yards. David hopes it will take only one more truckload to complete the driveway to the road. I hope so, too. Each truckload costs more than $1,000.