Converging on an inspection

We are near a point of convergence on the house. Most of what we need for a reinspection of our framing and plumbing is complete or nearly complete.

I have been working on things that need to be done and that the inspector said we can do before we get the inspection and start drywalling. We decided for various reasons to use acrylic-fiberglass shower and tub surrounds. Those need to be braced so that they don’t give when you push against them. I did some of that Sunday afternoon. This is the shower enclosure. I have put in around 15 2×4 braces for the shower.

showerbracin

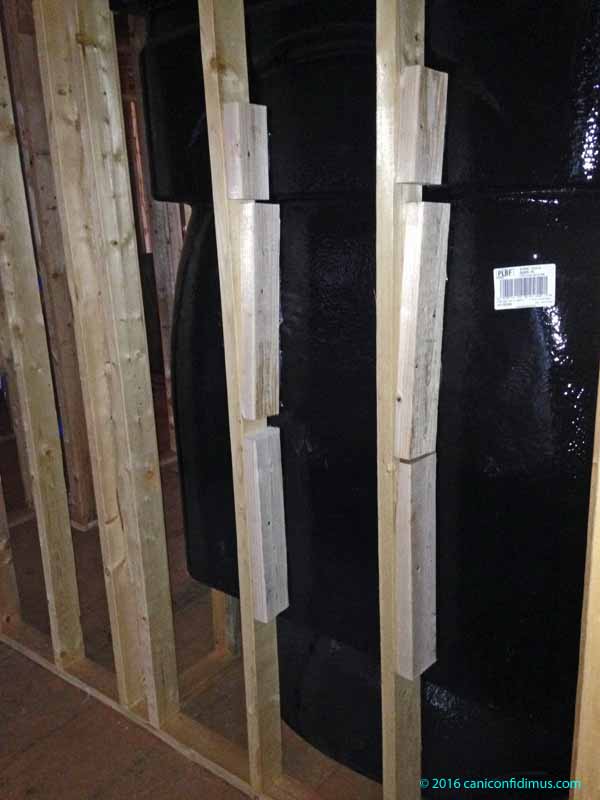
The tub will have even more bracing, but I couldn’t work on that on Sunday because I ran out of screws to attach the tub enclosure to the studs.

I have been planning to put some 2-by material behind the drywall around the toilets for installation of grab bars. I intended to do that on Sunday, but I discovered two studs with significant crooks right where I needed to put the grab-bar anchor material. One stud was about an inch proud of the rest of the studs on the master bathroom wall. I think drywall can hide some variation, but not that much. There was also another stud standing proud of the wall next to the toilet in the guest bathroom, so I couldn’t work on either toilet. Those go on the list of work for the framer.

I have also been working on insulation. It’s an itchy business.

insulating

I plan to put another type of insulation on at least one of the master bathroom walls. That wall separates the bathroom from the living room. The insulation will be sound insulation. Regular fiberglass insulation does virtually nothing to stop sound transmission. Right now it looks like the sound-deadening insulation for that one wall will cost more than the thermal insulation for the entire house. But I think you can understand why we might want sound-deadening insulation between the bathroom and the living room.

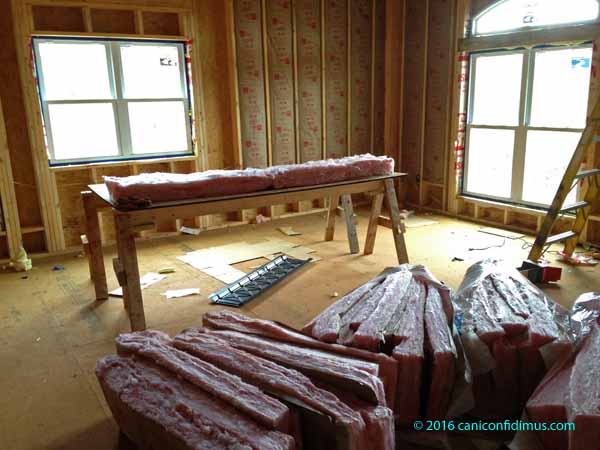
I have an additional task (I call it a “task” rather than a “problem.”) that needs to be done prior to drywall. We have equal-leg arches over the living room and bedroom windows on the front of the house. You can see most of one in the photo above. I have to cut plywood in an arch that matches the window so that the area around the arches can be insulated and drywalled. I have been thinking about this problem task, but I haven’t reached a conclusion yet.

The electrician has completed all the wiring that will be hidden behind drywall. The only thing standing in the way of completing the insulation (aside from my own procrastination) is the plumbing inspection. At least I can insulate every stud cavity that doesn’t contain plumbing.

The rim boards that will be used to reinforce the floor joists are supposed to be at the lumberyard Monday. The framer has been waiting for that. With a good crew, all of the framing work on my list should be completed in a day.

The electrician and the well installer came out last week, and we now have temporary power to the well pump. The plumber has been waiting for that so he can check the supply lines. We already know of one leak. Whoever put the PEX line to the pressure tank forgot to cinch a clamp, so when the well guy and I powered up the pump, the connection leaked. The line from the pressure tank to the rest of the house was shut off, so I don’t know if there are other leaks. There are certainly plenty of places for them. I think the plumber can complete any work he needs to do in a day, assuming there are not too many leaks (an assumption I’m not willing to make at this point).

Once the framing and plumbing pass inspection, we will be free to proceed with drywall. Of course, I need to finish insulating the walls before that happens. I hope all of this, including the inspection, is done by the end of the week. Leah suggested that I may be expecting too much.


Unloading the stove

When we bought out new wood-burning stove a month ago, we left it at the store, thinking we would pick it up when it was ready to install at the house. A month later, we aren’t close to that point, so I decided to bring it home Friday.

Here it is in the bed of the pickup. That’s Chloe walking at the right side of the truck.

stoveintruck

It had been strapped down for the hour drive back from the stove store, but at 300+ pounds, it is unlikely that it would have moved much on the trip.

Prior to this point, after trying to push the stove to lift one side, I had spent considerable time contemplating the problem of how to unload it by myself. I knew I couldn’t count on Chloe for any help. I briefly considered using my hand truck, but the lifting platform on the hand truck wouldn’t have provided sufficient support for the stove pallet. Besides, there was really no way I could have tilted the stove and hand truck back far enough to balance the stove over the wheels. And even if I could have done that, it was have been too unstable on the narrow hand truck. I didn’t even want to think about controlling 300 pounds as it rolled down the ramp.

So I decided to simply drag the stove out of the bed. In the photo above you can see the chain I connected to a winch, which was hooked to the trailer hitch on our little Kawasaki Mule. I used a big pry bar (which you can barely see above on the right side of the bed) to life the pallet and slide a couple of pieces of plastic “boards” under it. The winch pulled the stove towards the loading ramp to the point that I could push it myself. Then I made the fortunate decision to tie a safety rope on the stove to control its descent down the ramp. Here it is resting at the bottom of the ramp. I used plywood covers for the ramp.

ontheramp

This looks worse that it actually was, but it might have been a different story if I had not tied if off. About halfway down the stove tried to turn sideways. My safety rope caught it so I could guide it down. As you can see, the plastic boards came out from under the pallet.

I was able to walk the stove the rest of the way down until it was flat on the concrete. Then I pried it up to slip the plastic boards under the pallet again and pushed it into the garage. And here it is, not quite all the way in.

inthegarage

As of now it’s safely tucked in behind the Mule in the garage, where it will stay until it’s time to install it. I’ll use my trailer to haul it to the new house. It will be much (much!) easier to load and unload from the trailer.

Still life with cat

slystilllife

Sylvester has been having a kidney problem. The vet thinks it’s kidney stones, so she put him on special diet. The other cats like it; Sylvester does not. Leah thought he might like a canned food, so she got the canned version of his special food. When Leah opens a can, the other cats stand around staring up at the countertop; they are in love. Sylvester does not particularly like it.

When Leah tries to feed the cats, she has to try to get Sylvester to eat his special diet while keeping the other cats away, and at the same time, she has to keep Sylvester away from the other cats’ food while trying to convince the other cats that their food is really great. It’s a struggle.

And soon we will have to worry about moving four cats to a new house.

Saturday sunset

It was sunset Saturday evening after a pizza and a quick trip to the mall. Of course all I had with me was my phone, despite my promise to myself to aways take at least our little point-and-shoot camera. This was the best I could do.

sunset19mar16

This is a panorama made in Photoshop Elements rather than by the phone itself. The pano-mode on the iPhone is convenient and works pretty well, but this was a stressing scene. All the color was in the brightest part of the sky, but the phone wanted to expose for the largest area, which left the bright part of the sky overexposed. I resorted to taking two separate images, forcing the phone’s camera to expose more accurately for the bright sky, but even so, it doesn’t really capture the sky as we saw it. I think I might have been able to do better, but the light was going fast. The actual scene when I took the picture was about five minutes too late to capture the really dramatic sky we saw when we first walked out of the mall. I couldn’t take the picture then without getting parking lot lights and other stuff I didn’t want, so we got into the car and drove to a better vantage point. That gave us a better view of the sky, but it was already too late.

The engineer’s report

I have before me a report from the engineer who inspected the damage to our floor framing caused by the plumber. The repair solution is not as bad as I feared. It consists basically of gluing and nailing a piece of 2×4 to each section of a joist that has been damaged.

The engineer didn’t confine himself to inspecting only the damage to the I-joists. He also looked at the floor as a whole with respect to the load it’s carrying, and he found another problem. This time the problem is the responsibility of the floor plan designer — me. There is a load-bearing wall on the main floor that is offset by a few inches from a load-carrying beam in the basement. The beam in the basement should have been placed directly beneath the upstairs wall. The engineer’s analysis indicated a potential eventual failure of the I joists because of the offset load. The framer doesn’t really think it would cause a problem, but, once the engineer puts it in writing, it has to be fixed.

I’m not a details kind of person, but when it comes to things like building a house, I do sweat the details. I should have seen this problem in the floor plan, and, if not then, during construction. But I didn’t. Fortunately this fix is also fairly simple, but it involves 23 joists.

I could do all the repair work, but I plan to let the framer do it. They will almost certainly be   much faster than I would be.

We also had the well pump installed last week. That will allow the water supply lines to be tested for the inspector’s approval, as soon as we can figure out how to get 220 volts to the well.

I am now in the process of insulating and doing some other things that have to be done before drywall can be installed. Part of that process involved climbing an eight-foot step ladder to work on the garage ceiling, which is about 11 feet high. Last Friday, when I was doing that, I managed to kick the ladder out from under myself, leaving me hanging from a rafter. The drop was not far — four or five feet — but it was onto a concrete floor with several boards lying directly beneath me. I was worried about my knees, but there was no choice but to drop. When I let go of the rafter, I hit the boards and fell backwards. I must have put my arm out as I fell, because I ended up with a sore shoulder. I’m afraid it’s a torn rotator cuff. If so, it will be the second time a step ladder has caused a rotator cuff tear. The previous time was a few years ago when I was staining a post on the lower deck of our current house. I fell from the first step and hit my left shoulder in just the right way to cause a clean tear that left my arm useless. This time my arm hurts when I do certain things, but I can still work with it.

The surgeon who repaired my first tear used to live across the street from Leah’s parents. He’s a nice guy and he did a great job on my left shoulder. The only evidence of his surgery is three small dimples arrayed around my left shoulder, plus a usable arm. I hope I don’t have to give him the opportunity to show his skills on my right shoulder. In any event, I can’t do anything about it until we finish the house. I can’t afford to take a month or two off from the work that still needs to be done on both the new house and the old house.